On 29.12.2023 I found an interesting video on YouTube called “37C3 – Toniebox Reverse Engineering“. Because both of my children have their own box I was quite hyped to try it out. My older daughter is not using her box that often so I wanted to use it to try out the custom bootloader and the teddyCloud mentioned in the video. This post is a write-down/writeup of all the steps I did to get my version ready to run. This is not meant to be a full “how-to” on all the steps for people without a technical background.
Links / Copyright
Nothing of the following code, etc. shown by me, is made by me. I just want to give an overview of how I did set up everything without going into the technical details of how it was created. You can find all the original information here:
- https://gt-blog.de/toniebox-hacking-how-to-get-started/
- https://toniebox-reverse-engineering.github.io/
- https://github.com/toniebox-reverse-engineering/
How to get started
Note: I did all this on my Windows 11 pc. So if you use something else it may differ. Also, both of my boxes are the 3200 version.
Requirements
- Python 3.12
- GIT client
- cc3200tool
- Custom Bootloader -> Download the zip file
- SerialToUsb-Adapter
cc3200tool installation
Open a PowerShell window in a location you like to store all the relevant stuff I used c:\src\toniebox\ and type in the following commands to install the tool.
git clone http://github.com/toniebox-reverse-engineering/cc3200tool.git
cd cc3200tool
pip3 install .
After installing the tool you should be able to start it by typing cc3200tool into your console window.
Open the box
To open the box, put it down on solid ground (no carpet) and push it hard down. Then turn it to the left while pushing. You should hear a noise when it opens up.
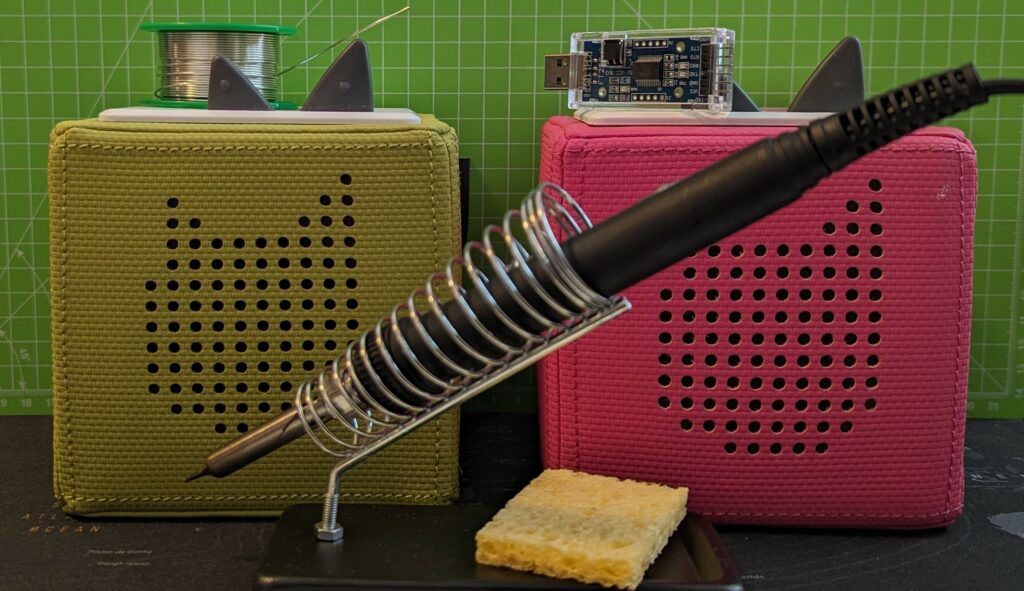
Soldering
Yes, for this solution with the teddyCloud you have to do some soldering or buy the adapter mentioned on one of the pages above. I did not want to wait for an adapter and the mentioned one was quite expensive so I chose the “solder some wires onto a board” route. I am not the best solderer and the solder points are very small – but I still managed to do it. Additional information can be found in the official wiki.
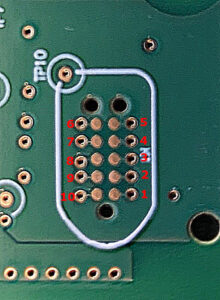
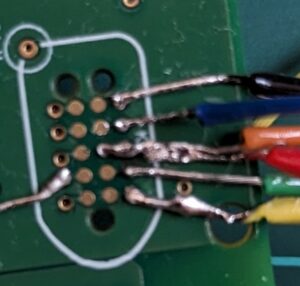
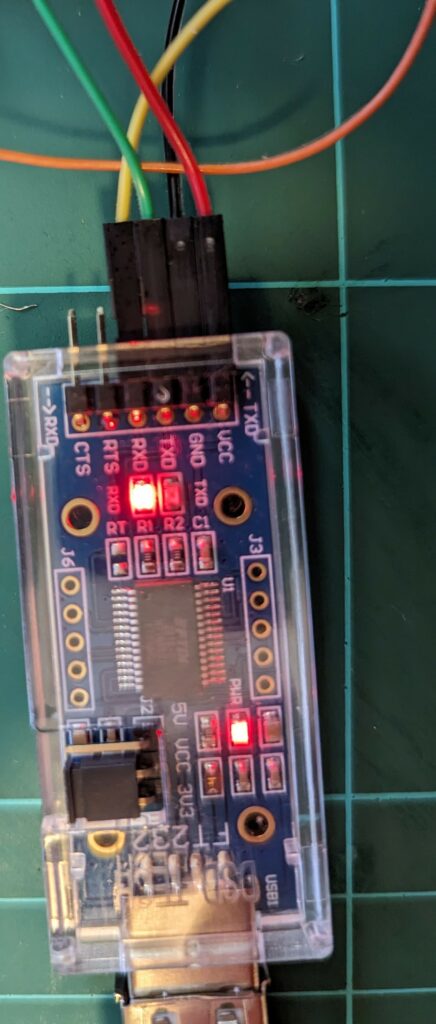
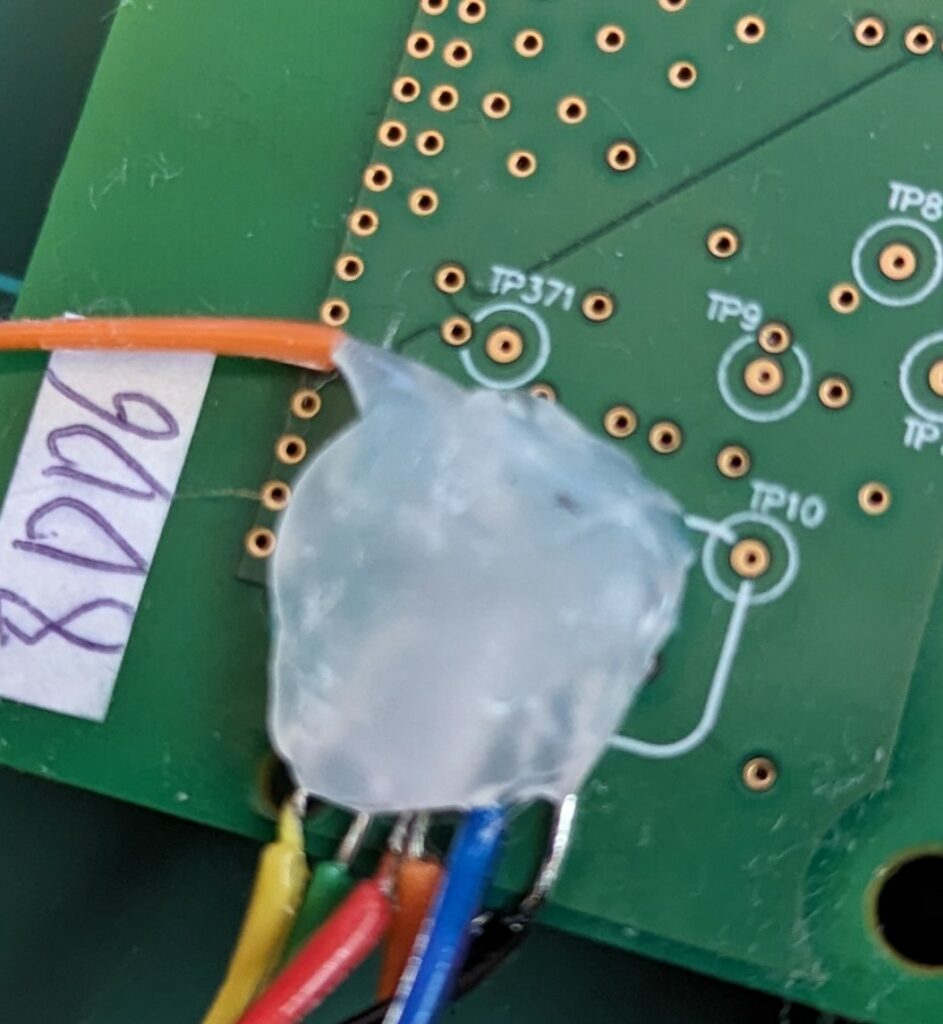
After soldering all the wires to the board, you must use a SerialToUsb-Adapter to flash the firmware. After I had made the backup, I used some hot glue to make sure nothing would break off or connect when I put it back together. The wiring should be:
| Board Pin | Flasher Pin |
|---|---|
| 1 -> TX | RX |
| 2 -> RX | TX |
| 3 -> VCC | VCC (3.3 Volt) |
| 4 -> RST | touch GND for 1 sec to do a reset |
| 5 -> GND | GND |
| 9 -> SOP2 | Connect to VCC while flashing (flash mode) |
Flashing the bootloader
Open a PowerShell inside of the unzipped bootloader folder. In my case hbng-bootloader.release_v0.9.3b. Do not skip the backup part! In between the commands you have to reset the chip by connecting Pin 4 to Pin 5 -> RST to GND.
# Note: Check for the right port in your device manager

# Backup all files
# Important do NOT skip this step!
cc3200tool -p COM4 read_all_files backup/ read_flash backup.bin

# Download firmware images
cc3200tool -p COM4 read_file /sys/mcuimg1.bin mcuimg1.bin read_file /sys/mcuimg2.bin mcuimg2.bin read_file /sys/mcuimg3.bin mcuimg3.bin

# Flash new bootloader
cc3200tool -p COM4 read_file /sys/mcuimg.bin mcuimg.bin write_file mcuimg.bin /sys/pre-img.bin write_file flash/sys/mcuimg.bin /sys/mcuimg.bin
teddyCloud setup
Now we have to set up our teddyCloud server to generate the required certificates for the box. In my case, I used a simple Linux machine with some space and no use of port 80 and 443. Here is my docker-compose file located at /data/docker/teddycloud:
version: '3'
services:
  teddycloud:
    container_name: teddycloud
    hostname: teddycloud
    image: ghcr.io/toniebox-reverse-engineering/teddycloud:develop
    ports:
      - 80:80 #optional
      - 443:443 #Port is needed for the connection for the box
    volumes:
      - /data/docker/teddyCloud/certs:/teddycloud/certs
      - /data/docker/teddyCloud/config:/teddycloud/config
      - /data/docker/teddyCloud/content:/teddycloud/data/content
      - /data/docker/teddyCloud/library:/teddycloud/data/library
      - /data/docker/teddyCloud/firmware:/teddycloud/data/firmware
    restart: unless-stopped
Additionally, I had to do the following things inside the teddyCloud folder:
# Not if you are not running as root - use sudo!

# Create folders
mkdir -p /data/docker/teddyCloud/certs/client
mkdir -p /data/docker/teddyCloud/certs/server

# Upload the client files from the box-backup
# Do this step on your local machine not the remote machine
scp <path_to_box_backup>/cert/*.der <username>@<ip>:/data/docker/teddyCloud/certs/client/

# Set all files to 755
chown -R 755 /data/docker/teddycloud/*

# Start teddyCloud
docker compose up

# Check for the running teddyCloud in your browser http://<ip>:80 -> Port 443 will not work in your browser because of the certificate required to authorize.
While the container is starting up, it will generate the server certificates you need on your box. You can copy them to your local machine with the following command and then upload them to the box:
# copy cert from server
scp <username>@<ip>:/data/docker/teddyCloud/certs/server/ca.der c:\src\toniebox

# flash cert to box
cc3200tool -p COM4 write_file ca.der /cert/c2.der
Prepare the SD-Card
You must remove the glue/gum that is in front of the SD-card slot by carefully pulling it off. Then you can push the metal thing forward and open up the card holder.
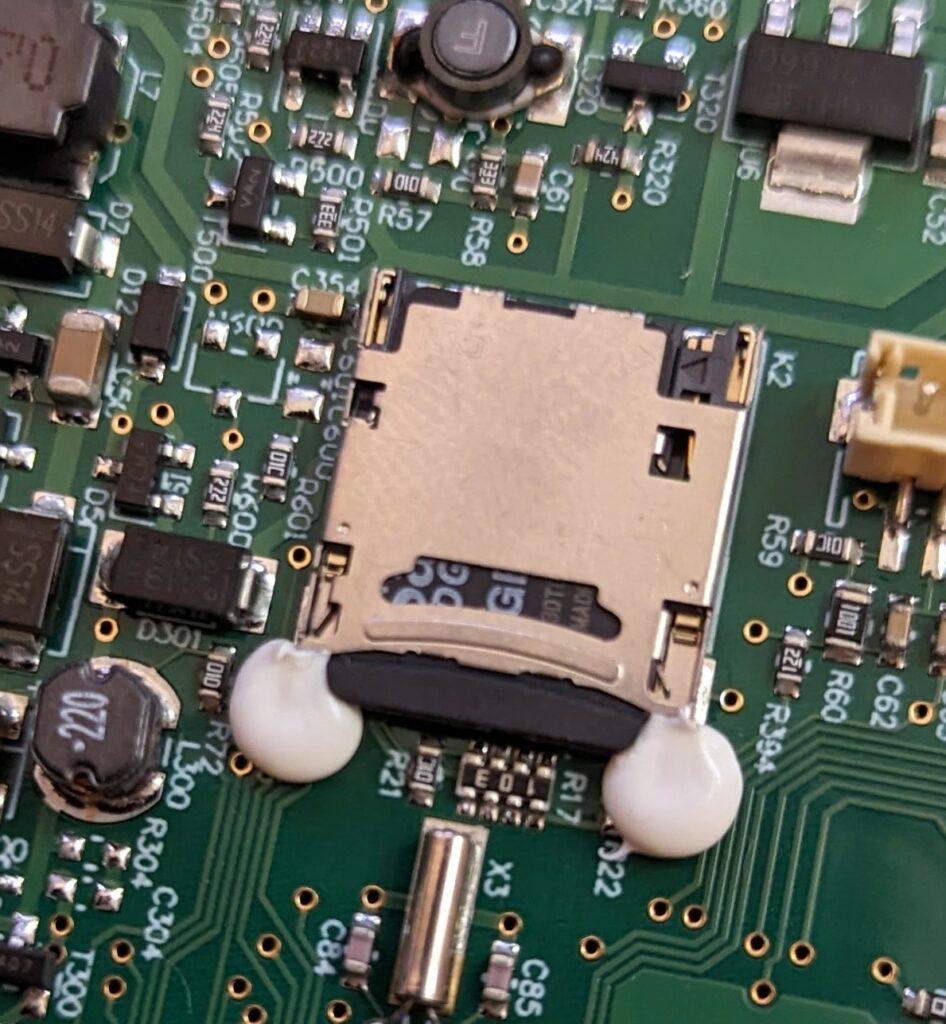

After you get the SD card you can copy the revvox-folder that is within the bootloader folder onto your card. Then I made the following changes to the ngCfg.json file to get the teddyCloud connection setup:
{
    "general": {
        "activeImg": "ofw2",
        ....
    },
    "ofw1": {
        ...
    },
    "ofw2": {
        "checkHash": true,
        "hashFile": false,
        "watchdog": true,
        "ofwFix": true,
        "ofwSimBL": true,
        "patches": ["altCa.305", "altUrl.305"]
    },
    ...
}
Note: If you have a fritz box you can use the patch mentioned here instead of the altURL.305 patch.
DNS settings
For the box to connect to your teddyCloud instance you need to set up some DNS changes in your local network. This part highly depends on your local hardware. For me, it was a simple entry into adguard-home/pi-hole to get the rewrite for the URLs: prod.revvox and rtnl.revvox to my server IP.
Final thoughts
In the end, I did manage to patch both boxes for my use at home but it was a lot of reading and searching so I think it is hard to do all the steps for people with a non-technical background. If you have any questions about my post and how I did the things – just write a comment. For questions about the firmware and so on, please join the Telegram group of the project.

huge thanks for your efforts.
the technical part (soldering, dumping, flashing etc.) is really easy. but for someone like me (heavy windows user for 20 years) the docker part is waaaaaay to complicated to set up and running.
there is a windows server exec on github, but that have several issues (certificates won’t be generated, config file change in the webinterface won’t be saved etc.). for certificate generation i setup a linux machine an running the shell script, after that, i was fine with the certificate part. but docker…. set up linux, get docker set up and running, pull image, load image an now? where is the data folder, how to adresse it, what to do with the yaml file etc. docker is overcomplicated for a person with 0 experience with it, even the documentation is a sheere monster.
the official documentation for teddycloud lacks any instruction how to handle the server part. here, use our docker image, thats it….
Hello Frank,
thanks for your feedback. If you still have trouble with your setup we can get in touch via Discord and I can try to help you to get everything up and running. Maybe we can add some additional steps to my guide if there are some steps missing. For me it is hard to recognize all the tasks that are new/hard for new docker users cause I use them automatically.
Greetings Ferdy